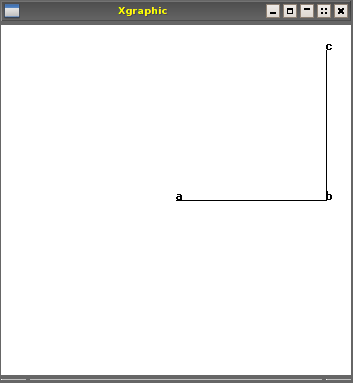
 ;;; We want to record the current location (c) so that a line can
;;; be drawn to this point later. So we save the coordinates in two
;;; Pop-11 variables, 'xloc' and 'yloc' created as follows:
vars xloc,yloc;
;;; record the current location in those two variables
(rc_xposition, rc_yposition) -> (xloc, yloc);
;;; Twice more, turn 90 and draw a line, printing 'd' after the first line.
rc_turn(90);
rc_draw(150);
printhere('d')
rc_turn(90);
rc_draw(150);
;;; This is what the display now looks like
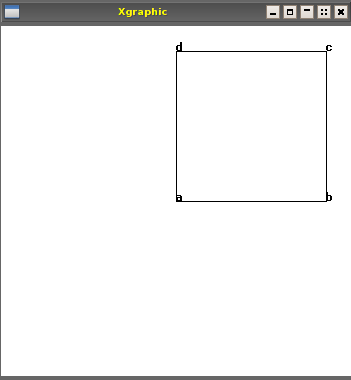 ;;; turtle now back at location a. We want to draw to c.
;;; this will do it, without using Pop-11's sqrt (square root)
;;; function to compute the distance to be drawn.
rc_drawto(xloc, yloc);
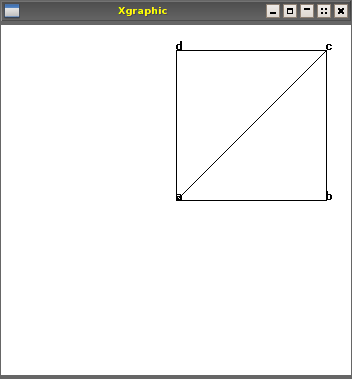
;;; And this is the picture produced, with the drawing
;;; turtle now at location (c)
 ;;; We can define a procedure, called 'rc_spiral' to draw a spiral, starting at
;;; location x, y, facing initially in direction heading
;;; with an initial drawing length of 0, then repeatedly increase the length
;;; by amount incr, change the heading by turnincr degrees,
;;; and continue until the number of lines drawn is sides
define rc_spiral(x, y, heading, incr, turnincr, sides);
;;; Move the 'turtle' to the start location
rc_jumpto(x, y);
;;; Make it point in the specified initial direction
;;; (0 means to the right, 90 means vertically upwards, etc.)
heading -> rc_heading;
;;; start a variable to hold the current length of line to draw
lvars draw_len = 0;
;;; start a loop, containing instructions to be followed 'sides' times.
repeat sides times
;;; increment the line length by amount incr
draw_len + incr -> draw_len;
rc_draw(draw_len);
;;; alter the heading by angle turnincr
rc_heading + turnincr -> rc_heading;
endrepeat
enddefine;
;;; remove the old window, and create a new bigger window
;;; size 550x550
rc_kill_window_object(rc_window_object_of(rc_window));
550 -> rc_window_xsize ;
550 -> rc_window_ysize ;
rc_start();
;;; Test the rc_spiral procedure
;;; Make it spiral round to the left, by turning 6 degrees after
;;; each line drawn
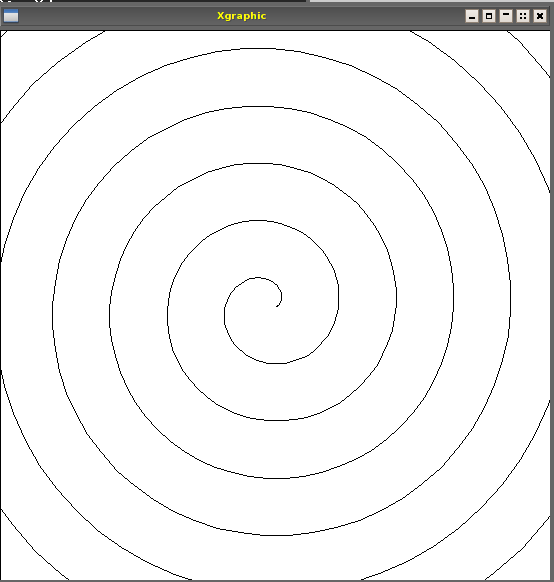
rc_spiral(0, 0, 0, 0.1, 6, 1000);
;;; producing this result
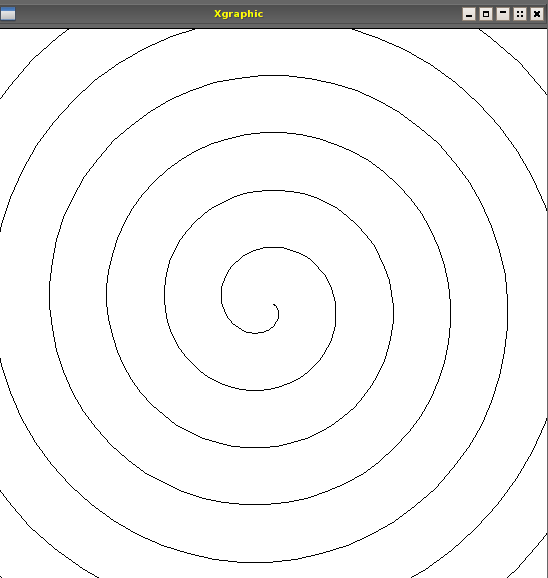
 ;;; Make it spiral round to the right, by turning -6 degrees after
;;; each line drawn, after clearing the display
rc_start();
rc_spiral(0, 0, 0, 0.1, -6, 1000);
 ;;; Now do both on the same display
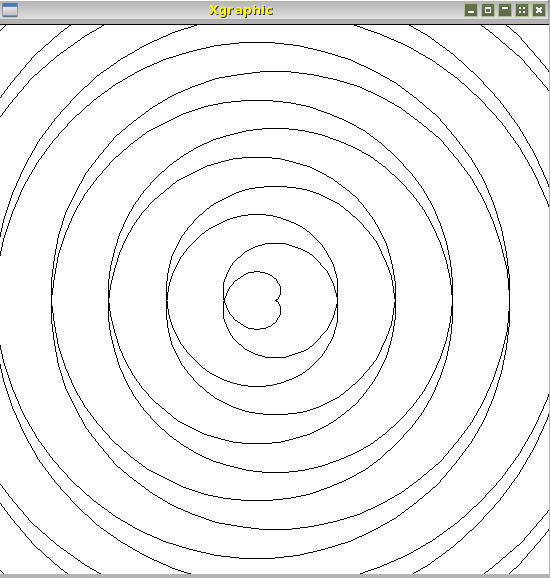
rc_start();
rc_spiral(0, 0, 0, 0.1, 6, 1000);
rc_spiral(0, 0, 0, 0.1, -6, 1000);
;;; producing this
To view actual size, use your browser's 'view image' option (e.g. right click on image, and select 'view image', in Firefox).
Very different examples: making silly faces A tutorial package for making silly faces out of circles and rectangles, is available, with results shown here.
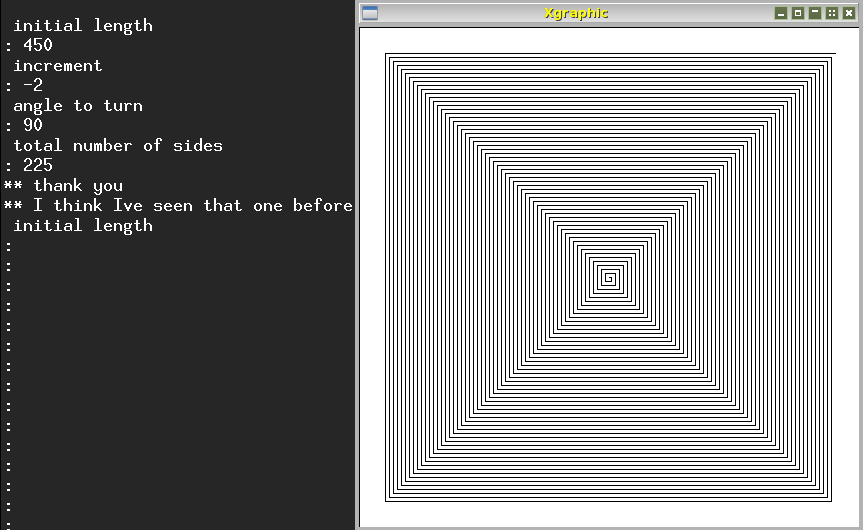
Examples using the RC_POLYDEMO library The Pop-11 rc_polydemo library is part of the RCLIB package. When run it interacts with the user, giving explanations of what it can do (draw "polyspirals"), and what the user has to provide, namely four numbers: initial length, length increment, angle to turn, total number of lines and also offers advice and prompts. If requested, it will provide example sets of numbers to try out. When given four numbers it uses them to produce a picture then prints out out a (randomly selected!) comment. Here are some examples of relatively simple interactions with rc_polydemo: Initial length: 400, Increment: -2, Angle: 90, Total lines: 225, produces this figure (growing in from the outside):
 To view actual size, use your browser's 'view image' option.
(Similarly with images below).
Question for learners:
What would happen if you made the turn angle 120 degrees?
What would happen if you made it 60 degrees?
What other angles would produce recognizable shapes?
Can you explain what happens when you try 135 degrees?
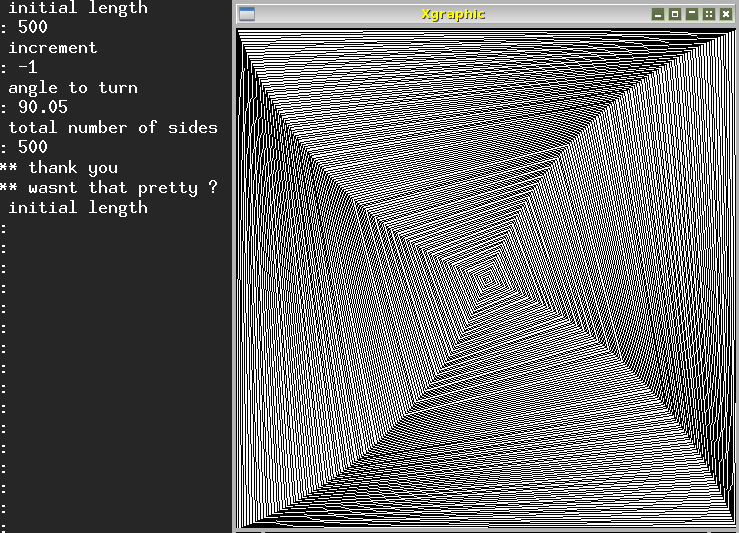
Initial length: 500, Increment: -1, Angle: 90.05, Total lines: 500, produces
this figure (also growing in from the outside):
 Questions for learners:
Why do the corners form those lines curving towards the centre?
What would happen if you made the angle to turn slightly bigger
or slightly smaller?
Initial length: 450, Increment: -2, Angle: 91, Total lines: 450, produces this figure
(growing in from the outside, then growing out "backwards" after the length becomes
negative, so as to produce two superimposed patterns [really needs a video]):
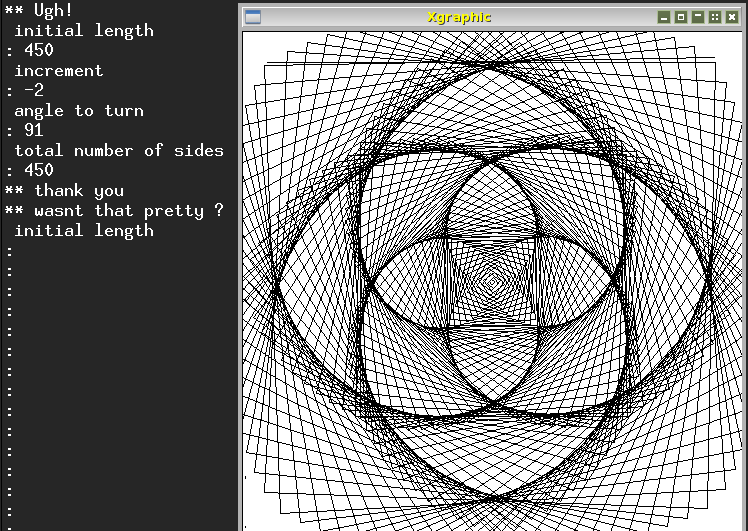 Initial length: 500, Increment: -1, Angle: 89, Total lines: 1000, produces this
figure (also growing in from the outside, then growing out again "backwards"):
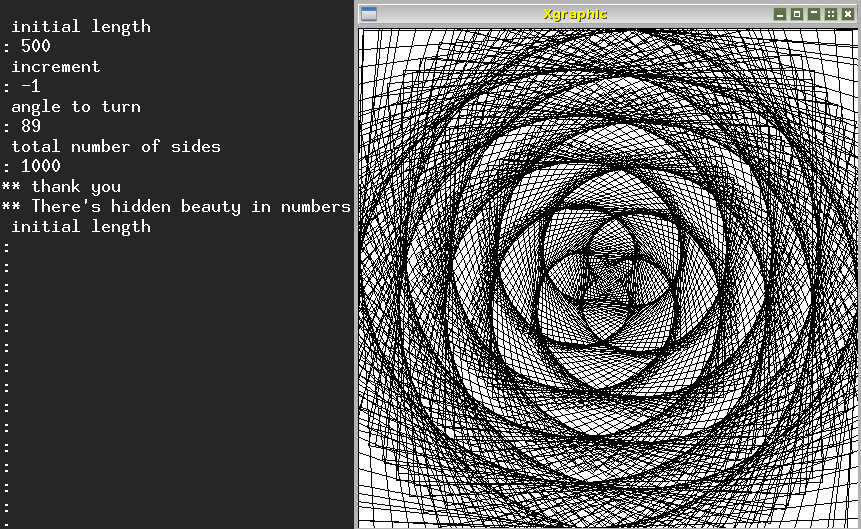 Questions for learners:
Why is this last picture more densely packed than the previous one?
Why does it spiral in (and out) more tightly than the previous one?
Initial length: 500, Increment: -1, Angle: 90.05, Total lines: 1000, produces this
figure (also growing in from the outside, then growing out again "backwards"):
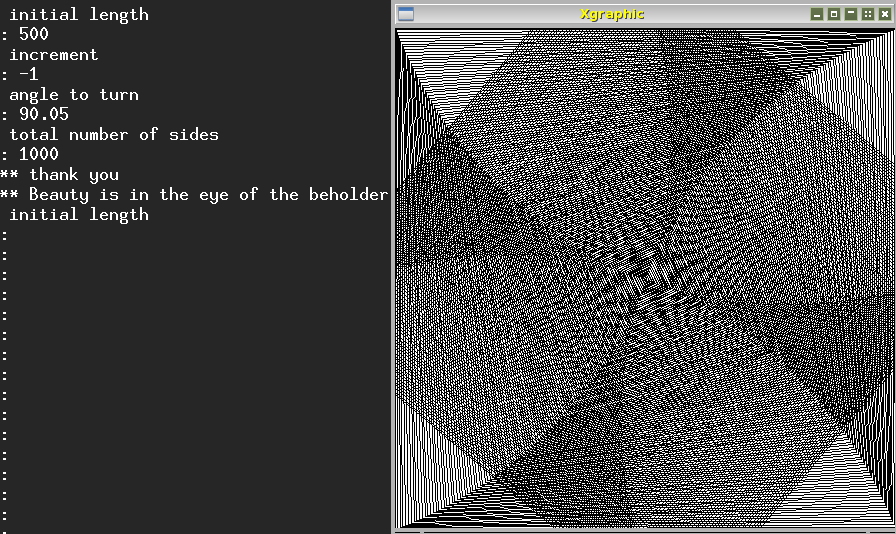 Questions for learners:
How do you make the picture spiral back to the same length as it started with?
Which turn angles cause the lines to spiral inwards in parallel, as in the
first picture above?
Using 135 degrees as a turn angle The previous examples all used a turn angle of 90 degrees or a little more or less. What happens if we use 135 degrees as a turn angle to try, and to vary. See if you can work out what's going on in the following three pictures:
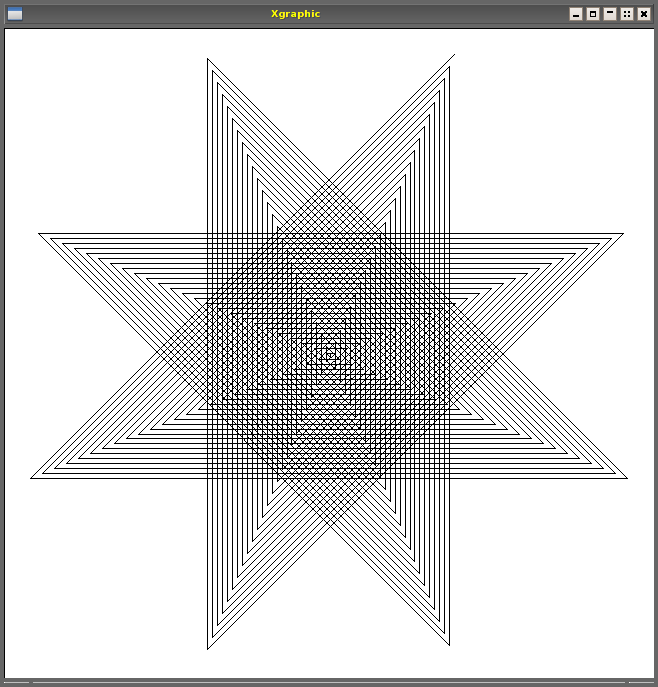 What other turn angles will produce a star shape like the above picture,
possibly with more or fewer corners?
How do the numbers need to be altered to produce the next two variants.
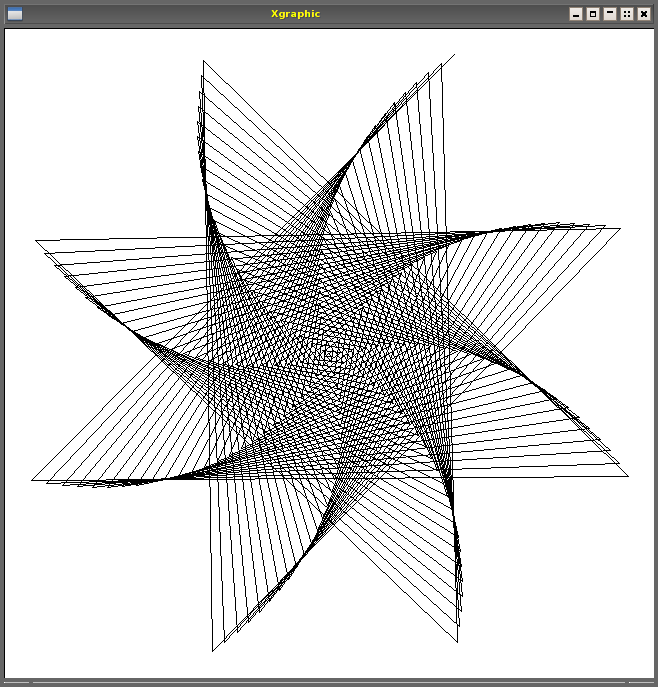
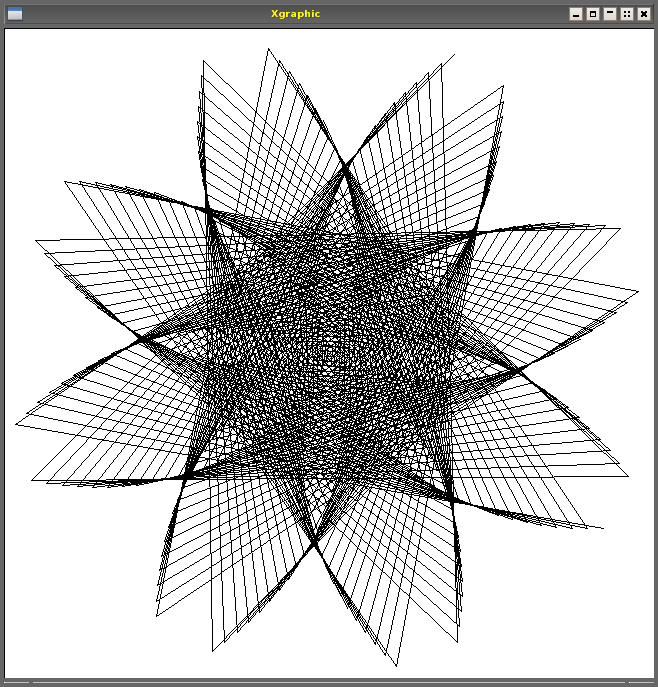 The four parameters used for the last three pictures were, in order:
Initial length turn number of
length increment angle lines
600 -3 135 200
600 -3 135.2 200
600 -3 135.2 400
Use the differences in the numbers to explain the differences in the
pictures, and try variations, especially in the increment, turn
angle and number of lines to draw.
Examples using the RC_POLYPANEL library This shows off many more of the facilities in the RCLIB package including sliders, active buttons, radio buttons, etc. (These are all implemented in Pop-11, using the Objectclass feature and the RCLIB package.) Rc_polypanel allows pictures "polyspiral" pictures to be drawn with different colour foregrounds and backgrounds, and at different speeds -- slowing down drawing is often essential for understanding what's going on. This example uses a blue background, ivory foreground, initial length 400, a decrement of 1, a turn angle of 89 degrees, and draws 800 lines.
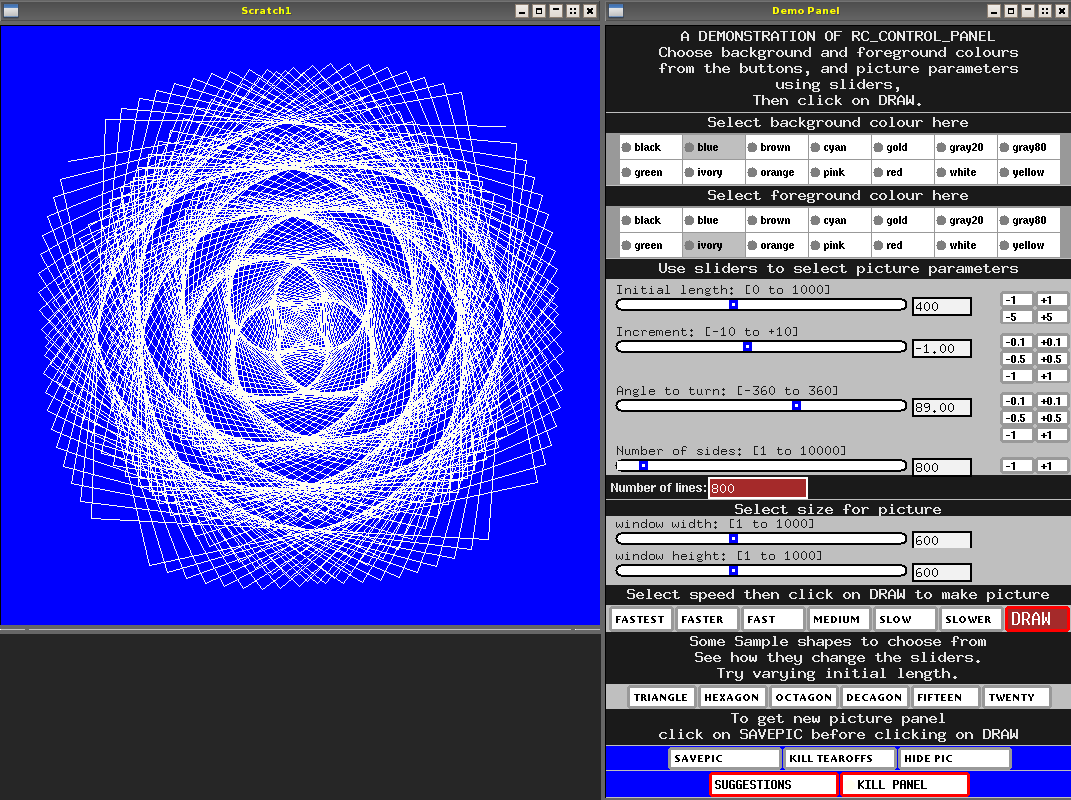 The user can choose a speed and then click on the "Draw" button. Drawing more
slowly can make it easier to understand what is going on. It is also possible to
create two or more instances of the panel (currently that would have to be done in
different pop11 processes because this demo uses global variables), and use them
with similar but partly different settings in order to work out how changing the
parameters affects what happens by comparing the results side by side (screen
resolution permitting!).
Clicking on the "Suggestions" button at the bottom brings up a text panel
suggesting some settings to try.
This tool can be used by a teacher with a group of students, discussing which
changes to make to the current settings on the panel in order to produce a
desired effect. Asking learners to make suggestions and to explain why they
think they will work is a way of helping them to understand as well as exposing
gaps or errors in understanding of the ideas regarding arithmetic and geometry
used in these demonstrations.
E.g. when asked how to make a triangle, many beginners will suggest a turn angle
of 60 degrees. This error can lead to a discussion of the difference between the
the angle between two headings (or vectors), and what is normally thought of as
the angle between two lines. Likewise discussion of negative increments can help
to enrich understanding about numbers. Further insights come from discussion of
what happens when the decreasing length of lines passes through 0 and becomes
negative. How should a line of lenth -10 be drawin in a certain direction?
The instructions for building the panel on the right can be seen in
this Pop-11 file.